
CustomGPT.ai provides various command line tools designed to serve different purposes and functionalities. One such tool is an automated test script from the CustomGPT.ai cookbook, which allows users to evaluate chatbot API performance directly through the command line interface.
This test script measures chatbot performance by calculating the accuracy and relevance of the responses, providing you with a framework for measuring answer accuracy.
In this article, we will explore the functionalities of this command line tool, demonstrating how it can enhance your interaction with CustomGPT.ai and improve the overall efficiency of managing chatbot conversations.
Let’s see how this automated test script measures chatbot performance.
How Command Line Tool Measures Chatbot Performance
The “Harness for Asking Questions” command line tool from the CustomGPT.ai cookbook is designed to measure chatbot performance by evaluating the accuracy and relevance of the responses generated by the chatbot. This tool automates the testing process, making it easier for developers and businesses to ensure that their chatbots provide meaningful and contextually appropriate answers.
Measuring Chatbot Performance with the Automated Test Script
The automated test script from the CustomGPT.ai cookbook simplifies the process of evaluating chatbot performance. Here’s how the platform works:
Sending Queries
- The script allows users to send a series of questions or prompts to the chatbot. These queries can be customized based on the specific use case or domain of the chatbot.
Receiving Real-time Responses
- As the chatbot generates responses to the queries, the script captures these responses in real time. This ensures that the evaluation is based on the chatbot’s actual performance during live interactions.
Calculating Accuracy and Relevance
- The core functionality of the script involves calculating the accuracy and relevance of the chatbot’s responses. It does this by comparing the words and phrases in the user’s query with those in the chatbot’s response.
- The script calculates a relevancy score, which indicates how many words from the user’s query are present in the chatbot’s response. A higher relevancy score suggests that the chatbot’s response is more accurate and relevant to the query.
Assessing Performance Metrics
- Based on the relevancy scores and the context of the responses, the script provides an overall assessment of the chatbot’s performance. This includes identifying areas where the chatbot excels and areas where improvements are needed.
Providing Insights
- The script offers detailed insights into the chatbot’s performance, helping developers and businesses understand how well the chatbot is meeting user expectations. These insights can be used to fine-tune the chatbot’s training for better performance.
In summary, the “Harness for Asking Questions” command line tool from CustomGPT.ai is an essential resource for evaluating chatbot performance. By automating the testing process and providing detailed performance metrics, this tool ensures that chatbots deliver accurate, relevant, and contextually appropriate responses, enhancing the overall user experience.
CustomGPT.ai Command Line Tool “Harness.py”: Understanding the Script Functionality Programmatically
Let’s break down the functionality of the script and how it operates under the command line interface.
Import the Necessary Modules
The script starts by importing necessary modules: requests for sending HTTP requests, json for handling JSON data, SSEClient for managing Server-Sent Events (SSE) to receive real-time responses, and re for regular expression operations in the similarity calculation.

The calculate_similarity function
The calculate_similarity function compares a user’s question and the chatbot’s answer by converting both to lowercase, extracting words using regular expressions, and finding common words between them. It returns the number of common words and the set of common words to assess response relevance.

Main Function: Setting up RAG API
This part of the script defines the main function, which sets up the RAG API endpoint and prompts the user to enter their RAG API token and project ID for authentication. It then configures the headers for subsequent RAG API requests, including content type, authorization token, and event stream acceptance.

Fetch Project Information
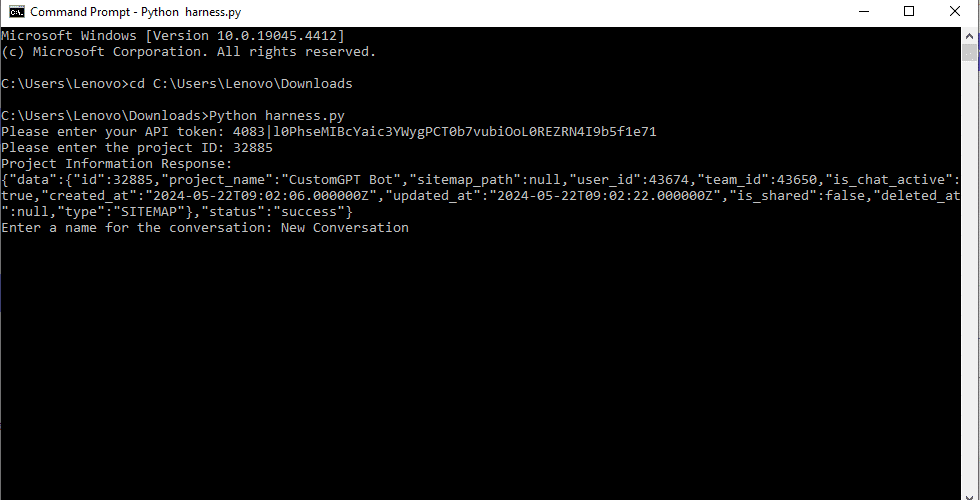
Now script fetches project information by sending a GET request to the specified RAG API endpoint. It constructs the URL using the provided RAG API endpoint and project ID. The request includes authorization headers with the user’s RAG API token for authentication. After receiving the response, it prints the project information response, including any data returned from the RAG API call.

Create Conversation within the Project
The script creates a new conversation by sending a POST request to the RAG API endpoint dedicated to conversations within the specified project.

- It prompts the user to enter a name for the conversation, which is then converted into a JSON payload.
- The request is made to the designated URL using the provided RAG API endpoint and project ID, along with the authorization headers.
- After receiving the response, it prints the conversation creation response, extracts the session ID from the returned data, and stores it for further interaction with the conversation.
Continuous Conversation Loop: Asking a list of questions
In this part, the script initiates a continuous conversation loop where the user can input a list of questions separated by commas. If the user enters “exit,” the conversation loop ends. Otherwise, it splits the input into individual questions and iterates over them.

- For each question, it constructs a JSON payload containing the question prompt and a flag indicating it’s a stream request.
- This payload is sent as a POST request to the RAG API endpoint dedicated to sending messages within the specified project and session.
- The script then establishes a server-sent events (SSE) client to receive the response from the server.
- As the response streams in, it prints the received message (the chatbot’s response) and accumulates it into an “answer” string. The loop continues until the server signals the end of the conversation.
Call to the calculate_similarity function: Analyzing Chatbot Response Similarity
This portion of the script calculates the similarity score between the user’s question and the chatbot’s response.

- It calls the calculate_similarity function, passing the question and the answer as arguments.
- The calculate_similarity function computes the number of common words between the question and the answer and returns both the similarity score and the set of common words.
- The script then prints the chatbot’s response, the similarity score (which represents the count of common words), and the set of common words.
Finally, the main() function is invoked if the script is run directly.
Testing script in the command line interface
To begin testing your chatbot’s performance using the command line interface (CLI) script, follow these steps:
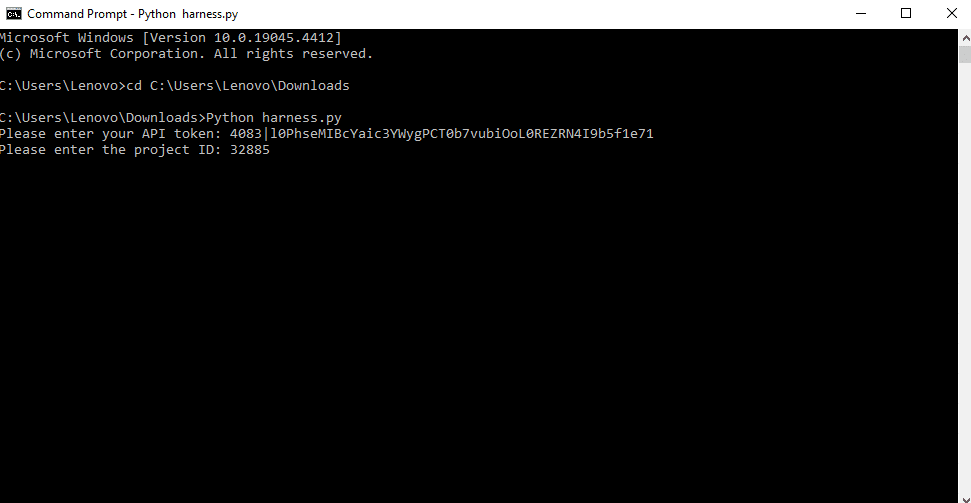
Open the Command line interface and download the script from the CustomGPT.ai cookbook by navigating to the script’s page and clicking on the download button. Save the script to a directory of your choice on your local machine.

Once the script is downloaded, write the path to the directory where the script is saved using the ‘cd’ command in the command line.

Follow the prompts in the command line interface to input your RAG API token and project ID. You can your RAG API token and Project ID from the CustomGPT.ai account.
Now Enter the name of the conversation to stream real-time responses.
Now write the list of questions to engage in a conversation in a chatbot. Press the Enter button.

From the list of questions being asked, one by one every question and its response will be displayed in the command line. The response to the first question is displayed as shown below.

Every response will be showcased in both the true and false streams, along with the associated similarity score.

Now let’s see the response to the second question from the list being asked and check its similarity score.

Now we will check the response to the third and last question from the list.

To exit the ongoing conversation, simply type “exit” into the command line interface and press Enter. This action will terminate the conversation with the chatbot, allowing you to conclude the testing session and analyze the results obtained.

Conclusion
In conclusion, the command line interface (CLI) script provided by CustomGPT.ai offers a convenient and efficient way to test the performance of your chatbot in real time. With our intuitive CLI testing script and powerful AI capabilities, you can optimize your chatbot’s responses and provide exceptional user experiences. Don’t miss out on this opportunity to revolutionize your customer interactions and streamline your business processes. Sign up now and take your chatbot to the next level with CustomGPT.ai!
Related Resources
These resources expand on testing, deployment, and practical use cases for CustomGPT.ai.
- CustomGPT.ai for Law — See how legal teams use CustomGPT.ai for research, document workflows, and secure knowledge access.
- Platform Integrations — Explore the tools and systems CustomGPT.ai connects with to fit into your existing workflow.
- Customer Service AI — Learn how CustomGPT.ai supports faster, more accurate customer support with AI-powered answers.
- Webflow Integration Guide — Review how to connect CustomGPT.ai with Webflow to embed AI experiences into your site.
- ReadMe.com Integration Guide — Find out how CustomGPT.ai works with ReadMe.com to improve documentation search and support.
- Python RAG Integration — Dive into building retrieval-augmented workflows with CustomGPT.ai using Python.
Frequently Asked Questions
What does a RAG API test harness measure?
A RAG API test harness measures chatbot performance by sending questions through a command line script, capturing responses in real time, and assessing answer accuracy and relevance. It then uses relevancy scores and response context to show where the chatbot is performing well and where it needs improvement.
What kinds of chatbot use cases can you test with the command line harness?
Stephanie Warlick, Business Consultant, said, “Check out CustomGPT.ai where you can dump all your knowledge to automate proposals, customer inquiries and the knowledge base that exists in your head so your team can execute without you.” In practice, you can test any use case that depends on a defined knowledge base, because the script lets you customize the questions or prompts based on your own domain.
How does the harness calculate a relevance score?
It compares the words and phrases in the user’s query with the words and phrases in the chatbot’s response. A higher relevancy score suggests the answer is more closely aligned with the question, which makes the tool useful for quick, repeatable command line testing.
Why do trusted sources matter when testing answer accuracy?
Elizabeth Planet, Nonprofit Leadership Coach & Advisor, said, “I added a couple of trusted sources to the chatbot and the answers improved tremendously! You can rely on the responses it gives you because it’s only pulling from curated information.” If you’re evaluating a RAG chatbot, source quality matters because the harness can only measure answers based on the knowledge you’ve given the system.
Can a test harness help you improve chatbot accuracy over time?
CustomGPT.ai outperformed OpenAI in a RAG accuracy benchmark, which highlights why repeatable evaluation matters. You can use a harness to review relevancy and response quality, identify weak spots, and fine-tune training based on the performance insights it surfaces.
Is the harness useful when you’re building a custom API integration?
Joe Aldeguer, IT Director at Society of American Florists, said, “CustomGPT.ai knowledge source API is specific enough that nothing off-the-shelf comes close. So I built it myself. Kudos to the CustomGPT.ai team for building a platform with the API depth to make this integration possible.” If you’re building a custom workflow, the command line harness gives you a straightforward way to test answer quality, and the API can fit into existing tooling through an OpenAI-compatible /v1/chat/completions endpoint with API key authentication.