
Integrating CustomGPT.ai with Zapier allows you to automate workflows dynamically, responding to specific triggers and facilitating seamless integration with various applications. This powerful combination enhances operational efficiency and provides personalized interactions. Before diving into the integration process, here’s how to add a sitemap and upload documents to your project.
How to Add Sitemap and Upload Documents
Integrating sitemaps and uploading documents in CustomGPT.ai is a straightforward process. Here’s how to add a sitemap and upload documents:
- Sign up to CustomGPT.ai
- Create a Project
- Start by creating a new agent in CustomGPT.ai.

- Insert a Sitemap or website URL. Use this CustomGPT tool to generate a sitemap.

- Add a Sitemap to an Existing Project
- Go to ‘My Agents’
- Select the data for the relevant project.

- You will be directed to the data settings, where ‘Sitemap’ is selected by default.
5. Add File to an existing project Through Upload Doc
- Go to ‘My Agents’ –> Click on ‘Data’
- Click on Upload Button —> Click on Upload Files
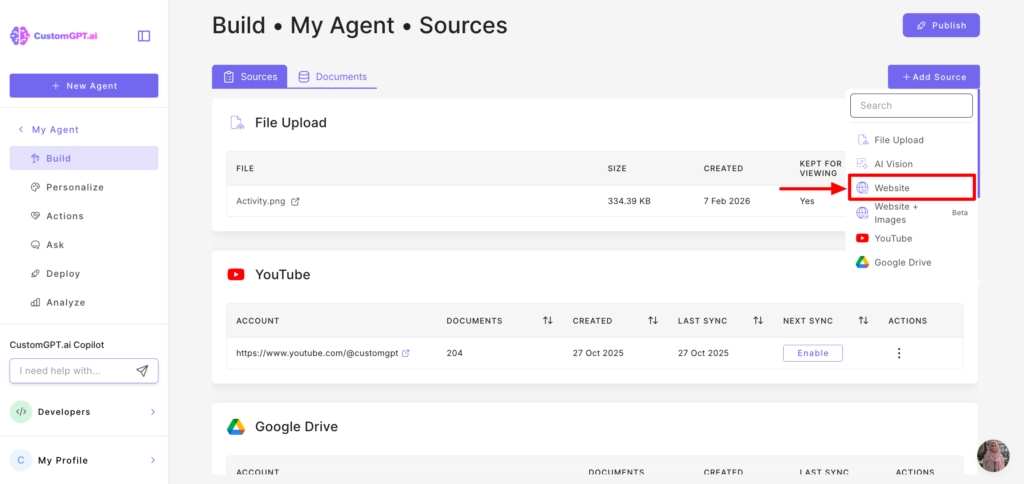
- Select and upload the documents from your device to your project.
Custom GPT + Zapier Triggers
Custom GPT + Zapier Triggers enable dynamic, automated responses to specific events, facilitating seamless integration between CustomGPT.ai and various applications. This powerful feature allows you to create tailored workflows that respond instantly to particular triggers, enhancing operational efficiency and enabling more personalized interactions. Below is a step-by-step guide on how to integrate CustomGPT.ai with Google Drive and Gmail through Zapier, along with the benefits of this integration.
How Custom GPT + Zapier Triggers Work
- Define the Trigger
- A trigger is an event that initiates an automated workflow. It could be an action such as Users requesting a specific content or information via the chatbot, a new document being uploaded to Google Drive, or any other specific event supported by Zapier.
- For instance, “New Document Uploaded to Google Drive” can be set as a trigger.
- Configure the Action
- Once the trigger event occurs, Zapier initiates a predefined action. This action could be anything from syncing data with CustomGPT.ai, sending notifications via email, updating records in a CRM, or other automated tasks.
- For example, “Sync the new document with CustomGPT for future retrieval” and “Notify the Customer Support and Marketing Teams via Gmail” can be configured as actions following the trigger event.
- Automate the Workflow
- Combining triggers and actions into automated workflows (known as “Zaps”) allows for efficient handling of routine tasks without manual intervention.
- These automated workflows ensure that all related tasks are executed promptly and accurately, improving overall productivity.
Step-by-Step Guide to Integrate CustomGPT.ai with Google Drive and Gmail
Here’s a step-by-step guide on how to integrate CustomGPT.ai with Google Drive and Gmail through Zapier:
- Go to Zapier Dashboard
- Click on the trigger.
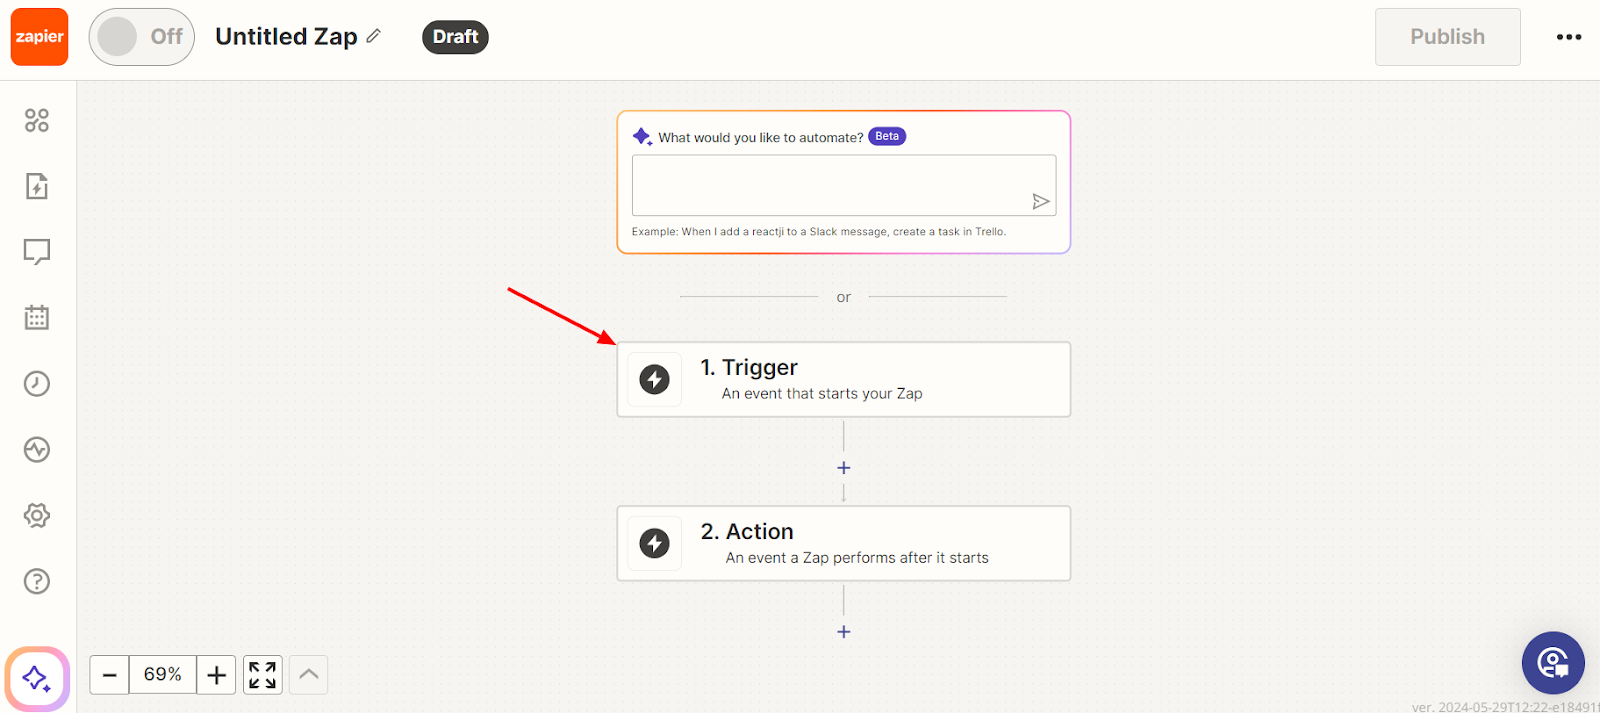
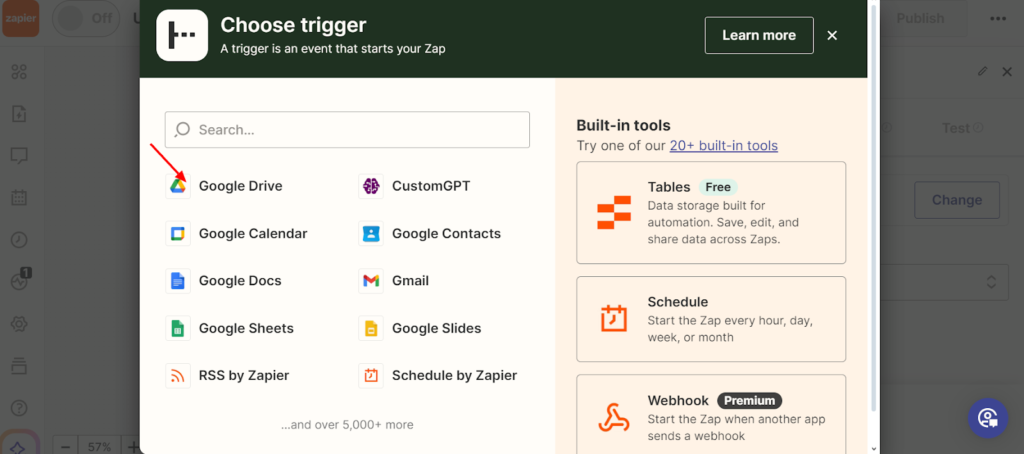
- Choose the Trigger
- In this case, click on Google Drive.
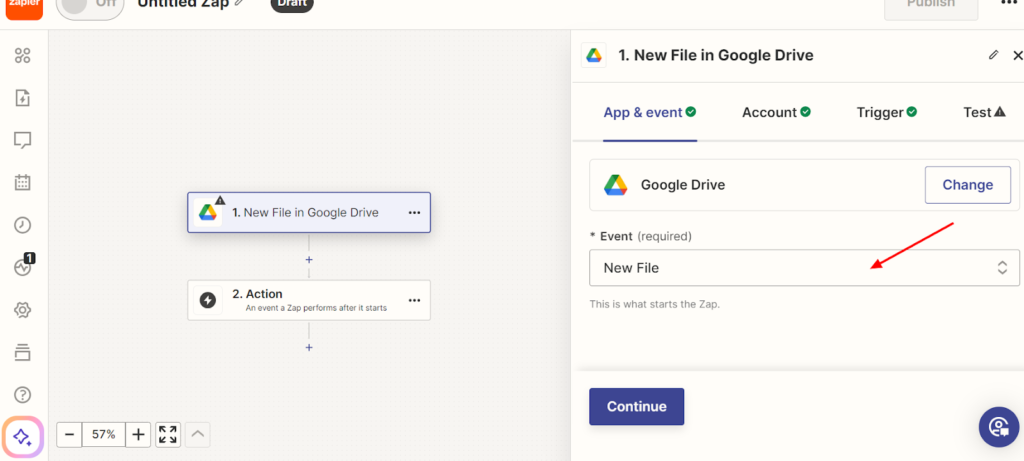
- Choose an Event
- Select a trigger when a new file is added inside any folder.
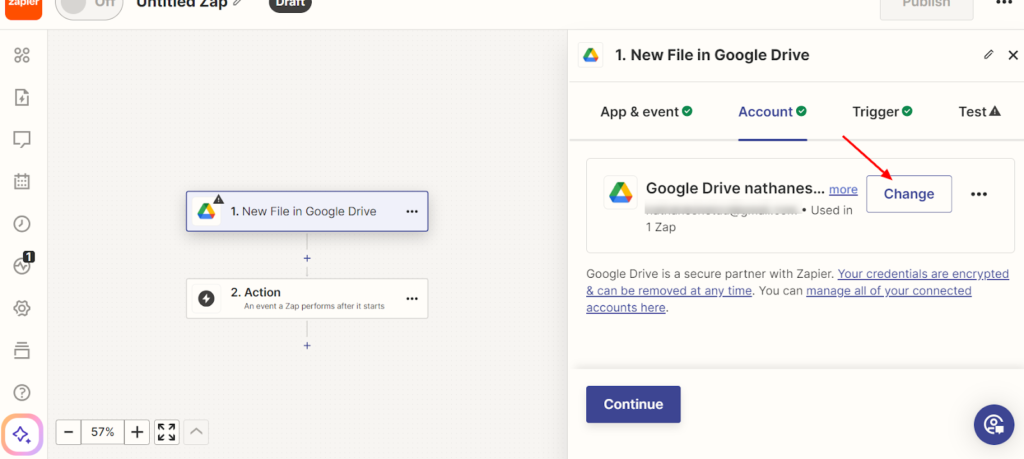
- Sign in or Change Your Google Drive Account
- Ensure you are logged into the correct Google Drive account.
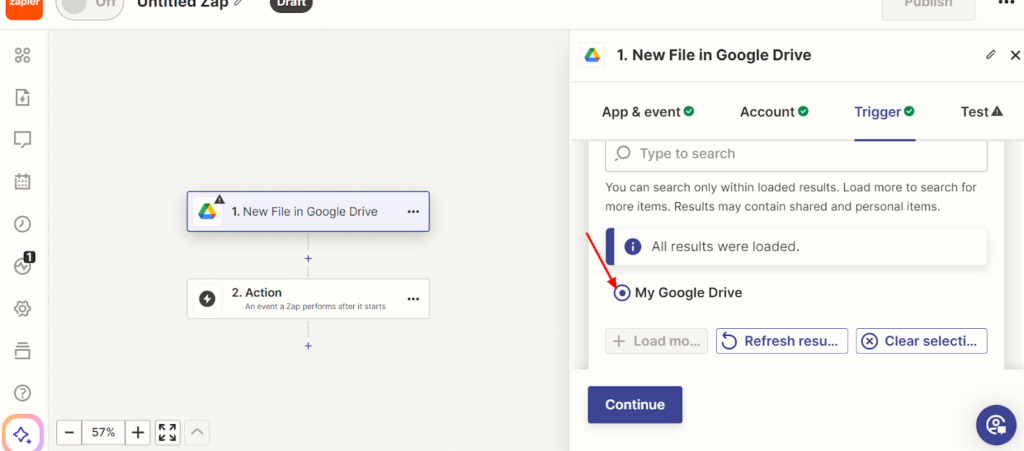
- Click on ‘My Google Drive’
- Select the specific Google Drive to monitor.
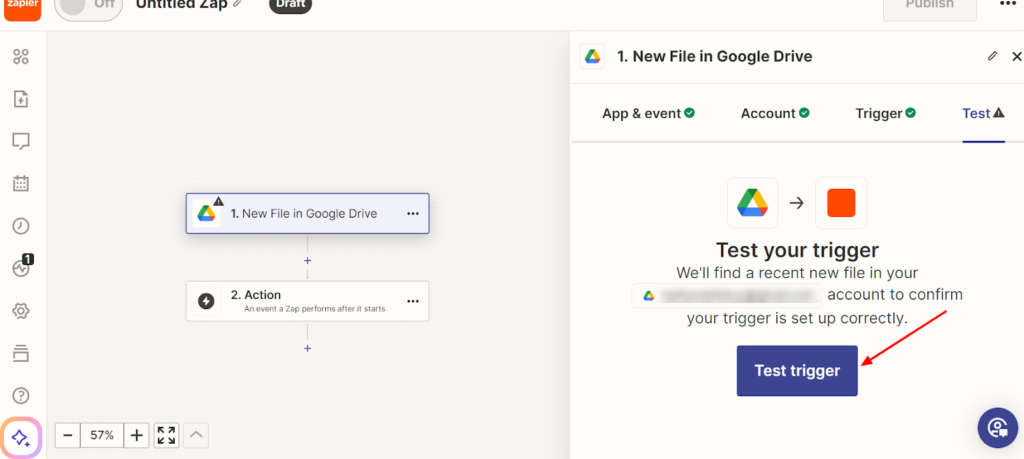
- Test Your Trigger
- Ensure the trigger is working correctly.
- Choose Action
- Move on to selecting the action that follows the trigger.

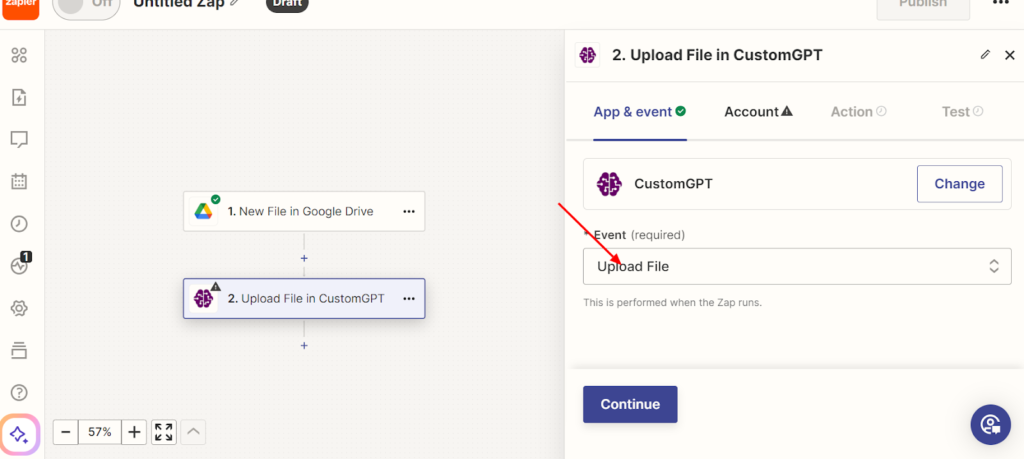
- Choose an Event
- In this case, select ‘upload file’ to sync with CustomGPT.ai.
- Select CustomGPT Account through RAG API
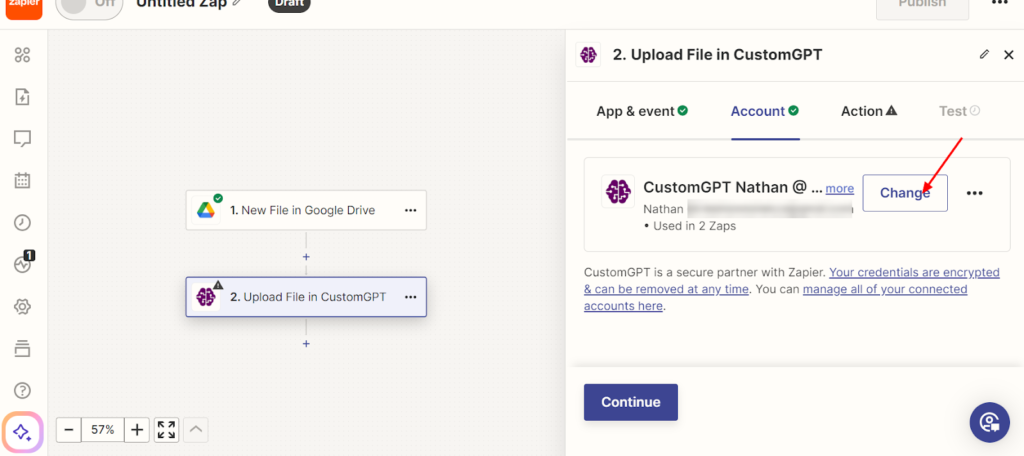
- Follow these RAG API steps:
- Go to ‘project settings’ on CustomGPT Dashboard and click on sharing.
- Click on API.
- Click on ‘create API’.

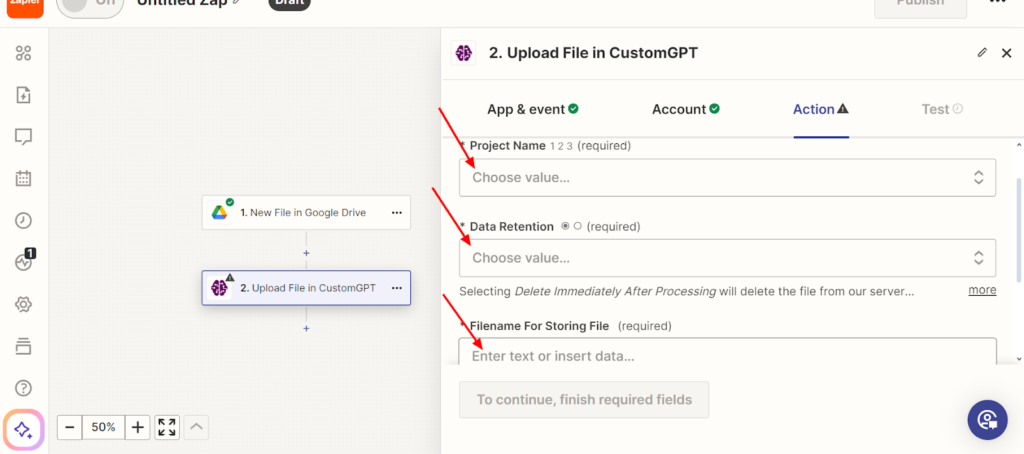
- Fill Out the Required Blank Spaces
- Complete details such as project name, data retention, and filename for storing the file.
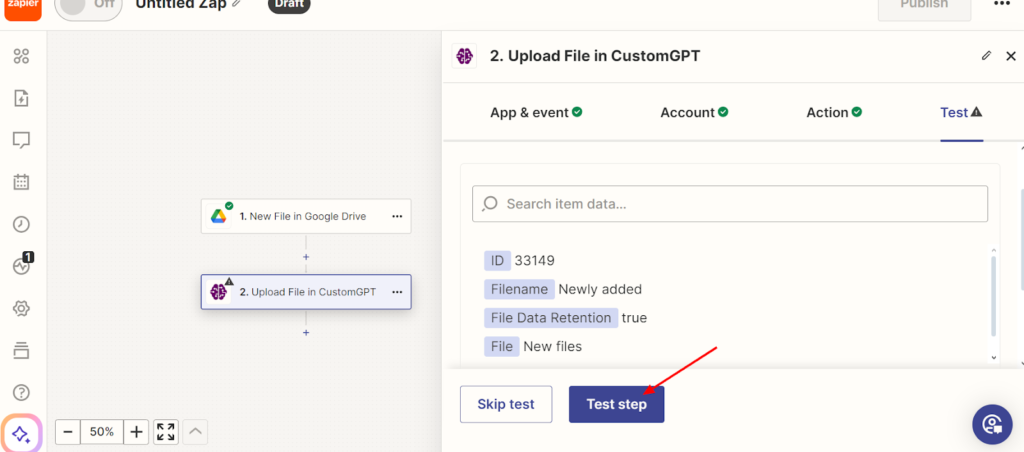
- Test Your Action
- Ensure the file upload action is working correctly.
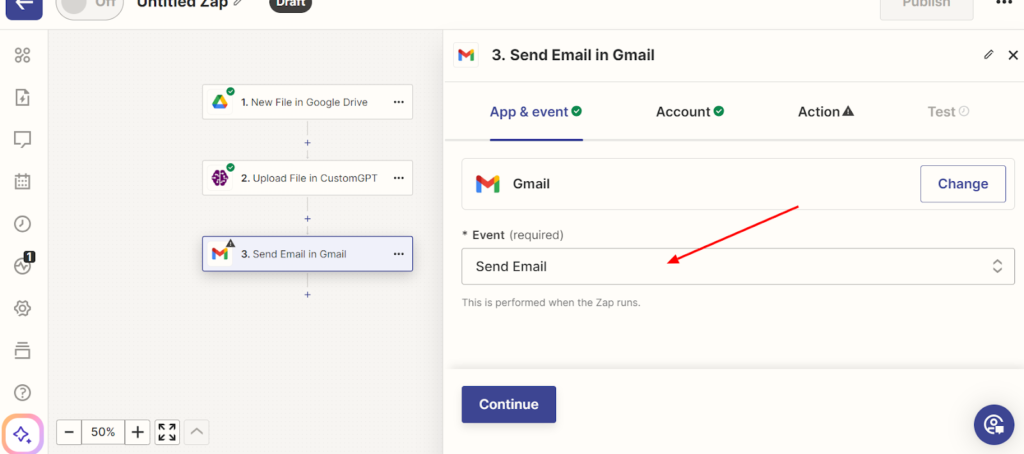
- Choose Another Action: Gmail
- Select Gmail for the next action.

- Choose an Action
- In this case, select ‘send an email’.
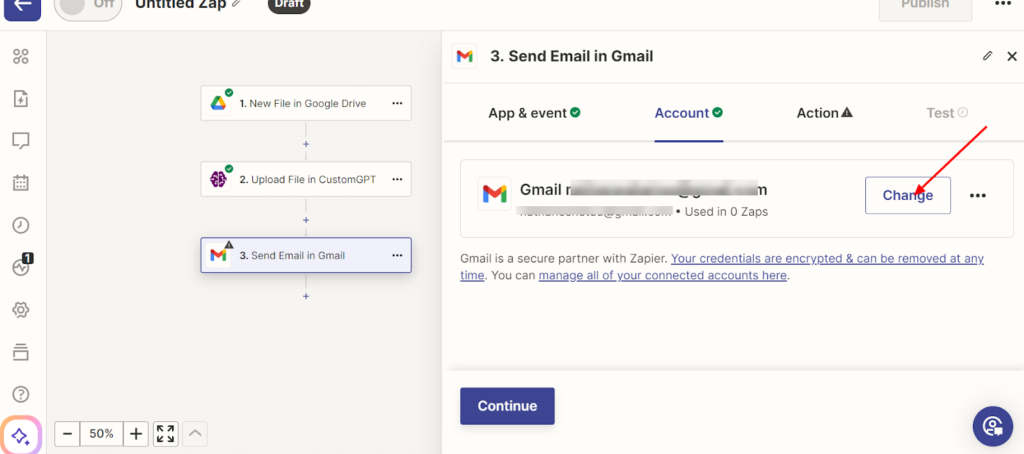
- Choose an Account That Sends the Email
- Ensure you are logged into the correct Gmail account.
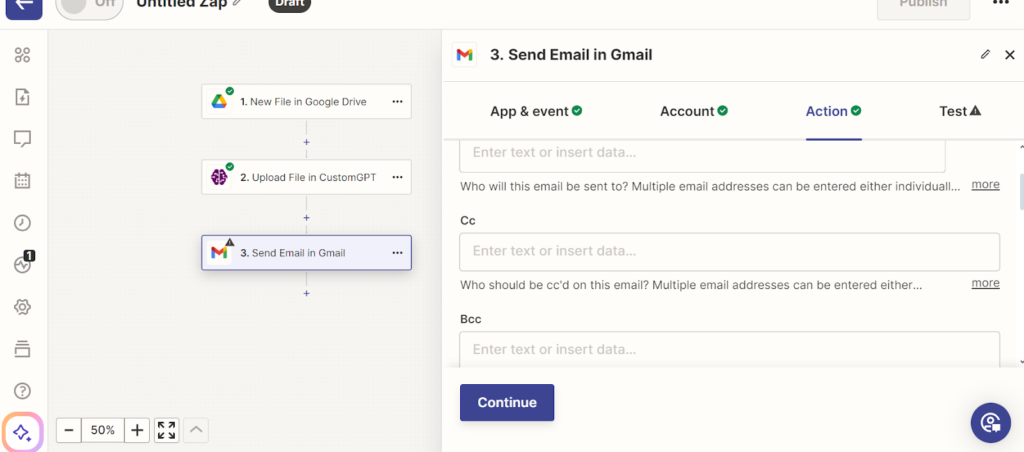
- Select the Email Address to Notify
- Write the email and specify the recipients to notify about the new document.
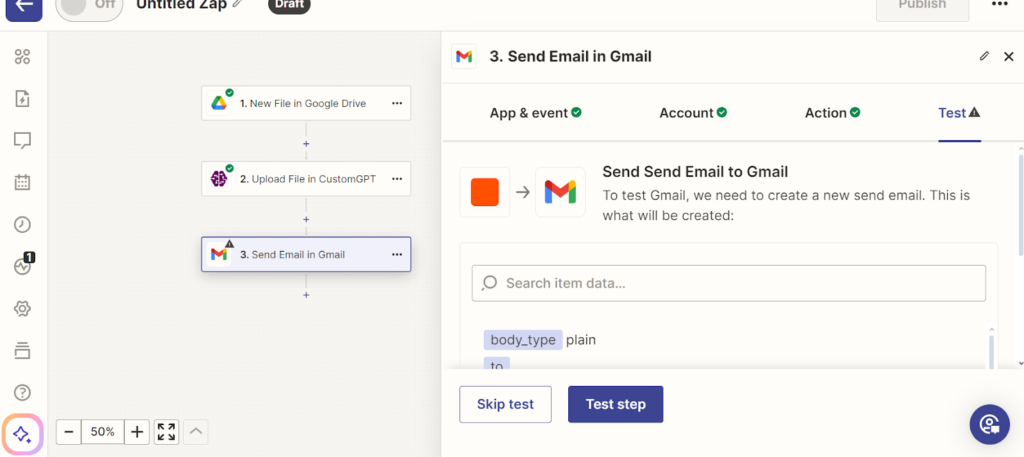
- Test and Publish
- Test the entire workflow to ensure everything is functioning as expected and then publish your Zap.
Streamline Your Operations:Get Started Today
Custom GPT + Zapier Triggers provide real-time automation, ensuring immediate execution of tasks and improved responsiveness. By creating tailored workflows, you can automate processes to meet your specific business needs, enhancing efficiency. Seamless integration with over 6000 apps on Zapier ensures comprehensive connectivity across various tools, forming a well-integrated digital ecosystem. As your business grows, these workflows can scale to handle increased complexity and volume, maintaining efficiency and consistency. The user-friendly setup requires no coding skills, making it accessible to all users. Experience the power of Custom GPT + Zapier Triggers and streamline your workflows today. Try the free trial and see the impact on your business operations!
Frequently Asked Questions
I can’t find Data Management in the dashboard. Where do I add a sitemap or upload files?
Use your agent-level data settings: go to My Agents, open the relevant agent, and select Data. From there, you can add a sitemap/website URL and upload files to that project.
Can I pull data directly from my website, or do I need to upload everything manually?
You can do both. The setup supports adding a sitemap or website URL for site content, and uploading files from your device for document-based content.
What is the best way to set up daily content updates from Google Drive or Gmail with Zapier?
Set a Zapier trigger from the app you use (such as a new file or new email condition), then map it to your CustomGPT.ai workflow action so updates can run automatically. Zapier is used here to automate trigger-based updates across connected apps.
Should I use sitemap ingestion, document upload, or both for one agent?
Use the method that matches your source: sitemap/URL for website content and file upload for local documents. You can also combine both in one agent when your knowledge base includes web pages plus internal files.
How can I confirm the bot is using newly uploaded data instead of older content?
After uploading files in My Agents -> Data, run test questions tied to the newly added content (for example, terms unique to the new document). If results are not updating, recheck that the file was uploaded to the correct agent and data section.
How is data protected when I upload documents or connect Zapier workflows?
The provided setup walkthrough focuses on how to add data sources and connect Zapier automation. It does not list detailed security controls in the excerpt, so for production decisions, verify current trust/compliance details in the platform’s Trust & Security documentation.
Can you give a practical example of this setup for an AI or data management company?
Example: a consulting team creates an agent, adds its website sitemap/URL for public service pages, uploads internal PDFs/playbooks through My Agents -> Data, and then uses Zapier triggers to automate ongoing updates from connected apps.